
My relationship with my Ukrainian heritage has always been minimal.
It has consisted mostly of pierogies – potato- and cheese-filled dumplings – for birthday dinners and my grandfather saying “dai bozhe” every time we sneezed.
It wasn’t until last February that my family and I decided to expand on our ethnic traditions and attend a workshop in my hometown on making pysanky – Ukrainian Easter eggs.
What makes these eggs different from the average plop-an-egg-in-some-dye decorating technique is the use of wax in creating a design. “Pysanka” derives from the Ukrainian word meaning “to write,” and in undertaking the craft, one has the creative opportunity to write a story or message on a blank eggshell. Our instructor had a massive collection of eggs decorated in every fashion, from intricate and traditional designs to simple flowers or geometric shapes.
Certain shapes and symbols in traditional pysanky embed many different meanings into the art form. For instance, a horse represents wealth and endurance. Baskets represent knowledge. Windmills represent happiness.
In browsing through the piles of eggs on my instructor’s kitchen table, however, the design that struck my eye was not made with these images. My instructor’s daughter had made an egg with a pastoral image of the Sierra Nevada – the same hills that could be seen outside the window.
 Maryrose Kulick
/ Daily Bruin
Maryrose Kulick
/ Daily Bruin
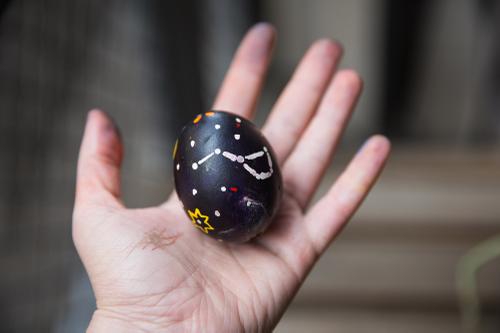
Inspired by this homage to our little foothill town, I came up with a design that also reminded me of home – a clear starry night sky decorated with constellations and other celestial bodies.
The amount of detail in your own pysanka will ultimately depend on your level of experience and the steadiness of your hand, but here are the basic things you need to get started on making an “egg-cellent” piece of art.
MATERIALS
Note: Complete kits are available online.
INSTRUCTIONS
Wash your hands with soap to make sure there are no extra oils on your fingers that will interfere with the dye.
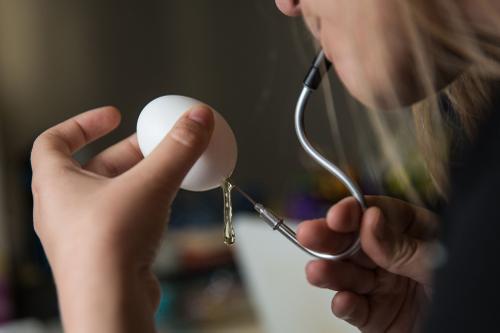
Prepare your egg. To make sure the final product lasts a long time, it is important to drain the liquid inside. Using the egg blower, poke a hole into the eggshell and blow into the mouthpiece, forcing out the yolk and egg whites. (If you don’t have an egg blower or any desire to get one, hard-boil your egg and you’ll have a fancy-looking snack to eat later.)
 Maryrose Kulick
/ Daily Bruin
Maryrose Kulick
/ Daily Bruin
To make design planning and color choice easier, envision what you want your egg to ultimately look like. Or wing it. That’s fine too.
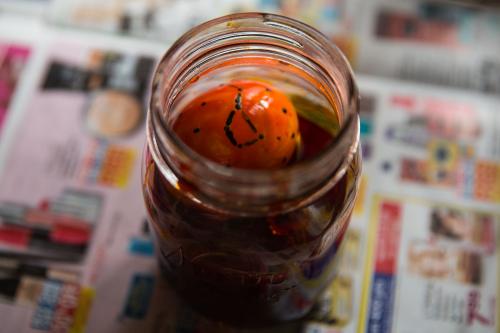
Prepare the dyes you plan to use (follow the instructions on the package).
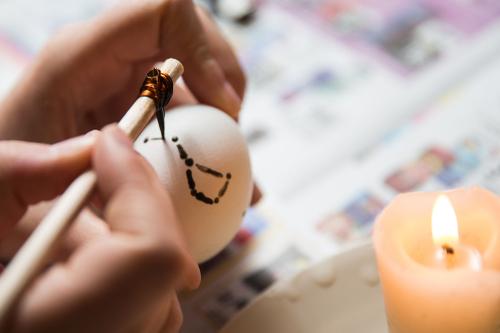
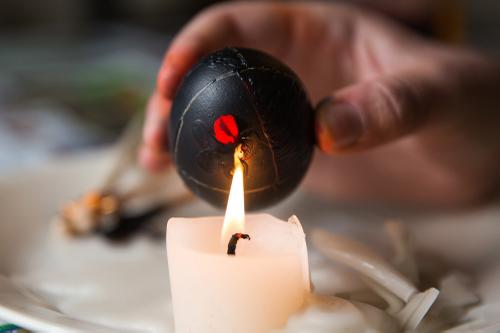
Light your candle, and heat the metal part of the writing tool in the flame. Then, dip the hot metal into the dark wax. Repeat this action until you have a puddle of melted wax.
Start drawing! Dip the metal tip into the puddle of wax and reheat it in the flame to initiate the capillary action, then draw whatever design suits you. Keep in mind that whatever you draw first with the wax will be white in color. If you don’t want any part of your egg to be white, then dye it first in yellow, orange, etc.
 Maryrose Kulick
/ Daily Bruin
Maryrose Kulick
/ Daily Bruin
An idea to get you started: Wrapping a rubber band around the egg makes a great stencil for creating straight lines or a border around the egg.
Pro tip: Make sure your strokes are smooth. Don’t go back and forth like you’re sketching. It will make the egg look scratched in the end.
 Maryrose Kulick
/ Daily Bruin
Maryrose Kulick
/ Daily Bruin
Pro tip: Keep in mind how colors mix. For instance, dyeing green over orange will probably turn the egg brown. If you want green on your egg, paint it onto the egg with a brush, and then cover the green areas with wax to prevent any unwanted mixing.
 Maryrose Kulick
/ Daily Bruin
Maryrose Kulick
/ Daily Bruin